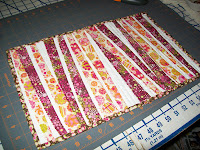

Don't forget to enter my giveaway to win my "Broken Breakfast" mini quilt by commenting on any of my "Jelly Roll (end of the) Week" posts and/or blogging about them for more entries! The giveaway is open till September 20th! So comment away and share the fun! One entry per comment, One entry for blogging, only one of each kind per post!
Sew many entries! Sew little time!
Of course, while your here enjoy a quick tute of a fabulously fun, little circular rug!
 Supplies~
1 yard of Textured of base fabric
1 yard of Heavy upper base fabric
approx. 44-2.5" strips wof or Jelly roll strips
Basting spray
I'm gonna talk base fabric first. I chose random fabric that I simply had in my stash and I have a lot of random fabrics! I chose something textured for the bottom as this is likely going infront of a dresser in my daughters carpeted room. I chose a denim for the top because I had it, it was sturdy for light traffic, and it was dark so hopefully it will not look dirty to quickly.
You may choose whatever fabrics you like for your base.
You might consider
a piece of canvas,
or heavy drop cloth,
or a light, thrifted rug
(though I would try to avoid anything to thick for sewing purposes and without a plastic bottom.)
The idea is that it will be completely covered anyway!
Making the base~
Fold your fabric square into fourths and stack both pieces. Using a push pin and a length of ribbon that reaches from the folded corner to the raw edge pin the ribbon down to the folded corner of the fabric. Stretch the ribbon across and holding the ribbon and pencil to swing across the edge mark a quarter circle on the top layer of fabric

Use this as a guide to cut through all thicknesses of your base fabrics.
Lay your base circle's out right sides together with the wrong side of the heavy layer on the top. Pin around the edge and sew together leaving a small 4"-6" opening for turning.
Spray the wrong side of the heavy upper circle with basting spray and turn the base piece right side out smooth the circles out immediately so the basting spray can hold it correctly in place.
I did my fabric in circles of receding sizes. If using an actual Jelly roll I would reccomend a spiral pattern instead do this by simply curving in slightly as you aproach the end of the circle you are working on and continue following the edge never finishing a circle round till you reach the center. I recommend this because of the lack of matching fabrics in a typical jelly roll. Spiraling justs give a more scrappy look.
Add your ruffles~
Start by ironing your strips in half lengthwise and trimming the selvages from your jelly roll strips.
 Sew your strip down as close to the outer edge of the upper base layeras you can (less than 1/4" from the edge), finger ruffling it slightly as you go.
 When you reach the end of one strip simply add another by butting the 2 raw edges together.
 If spiraling simply curve inwards slightly once you have made a full circle to the next row. If you're doing full color circles finish a row by ruffling your fabric and trimming it to meet the beginning of the row you were working on and doing a small backstitch.
 When you add your inner rows pull the ruffles from the outer row away from the fabric strip you're working with and line up the edge of the new strip with the sewing line of the first to get your placement spaced right. Continue in this manner adding circles or spiraling inward till you reach the center.
 For spiralling simply curve till you get there do a little backstitch and your done!
For circles you will take a scrap of one of your strips and using pinking shears cut out an approx. 2.5" circle.
 When you reach the center there should be a hole about the size of a quarter left to fill.
  Place your 2.5" circle directly over this space and do a little backstitched X in the center!
Hurray we're all done!

These are super cute and fun for a kitchen, bathroom, or bedroom depending on your jelly roll :)