On the fifth day of Christmas my true love gave to me, 5 Brand New Crayons!

...Plus a few extra incase those first 5 get broken :)
I love crayon rolls!
It's my personal opinion that if you have a child between the ages of 3 and 8 a great go-to gift is always going to be a crayon roll!
Kids are so creative at that age and these give coloring there own style and even more fun!
I've been looking for the perfect way to use this great novelty print from Bunny Hill Designs (Japanese Import fabrics) and this is going to be perfect!

And to top it off they're really simple!
You can make one from a fat quarter, a batting scrap, and some binding in an hour or so! Seriously!
Christmas gift done? Check!
I love that!
To make your own~
cut 2-5"x20"strips (one is the outside) and 1-6"x20" (I left mine long and trimmed later, all of my strips were approx. 8"x22" but if using a fat quarter you'll need to be a little more stingy with your fabric!)
Fold the 6" strip in half lengthwise and stack on the matching 5" strip lining up across the bottom edge. Sandwich with the outside layer, a piece of batting cut slightly larger than the whole project, and the inside strip and folded strip.

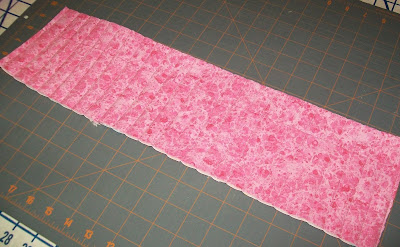
Now baste, pin, whatever, just prep it for quilting. Sew strips across the short width of the quilt sandwich, 3/4" apart, to quilt and make your crayon pockets at the same time.

Making sure you have enough pockets for the number of crayons you will be using (I have 24 crayons and trimmed it to 26 pockets so I could bind it)
Square and trim your mini quilt roll to approx 5"x 18 1/2"

Bind as desired and add your crayons. Roll up and place a pin where the overlap ends.
 Unroll and remove the crayons (atleast the 4 around the pin) and stitch in place a 1" piece of velcro sewing only on the already stitched seams. Cut out a shape from an accent fabric batting and backing, (Mine was cut from excess that was already quilted together) quilt it and attach half to the end of the crayon roll sew the other side of the velcro to the underside of the shape.
 (After the fact, I measured and if you want to add your velcro during the first stage of quilting it should go on between about 7 3/4" and 8 1/4" according to my finished roll. I have yet to test that number though :) Good Luck!)

 |


easiest crayon roll tutorial I've ever seen--thankyou! Just in time for some last minute gift giving!
ReplyDelete