This post shall be alternately known as - The best chess board ever!

I love board games and learned to play chess with my dad one New Year's Eve way back when. I thought my girls deserved that same opportunity when I was wonderfully gifted a set of chess people from my mother in law! Sadly they had no board to play on or maybe not so sadly!
I made this awesome fabric chess board in an afternoon.
 I love it and you can have one too!
All you have to do is find a 19-20" square-ish board
5-6 - knobby legs (if desired)
2 - fat quarters of contrasting fabric for squares
(Maybe a little more if fussy cutting is required... you'll need 32 - 2" squares of each color so, you decide)
1 - fat quarter for the border
Mod podge
Cut 32 - 2" squares from each of your contrasting fabrics to start. That's the hardest part right there! So easy!
For the board you'll want to start by screwing the legs on however you need to one in each corner and 1 - 2 in the center.
Then coat well with white paint.
To figure out the placement of your squares you have to options. Eyeball it, or measure. Dang. It's alright, the measuring's not so bad.
Here's what you do figure out the basic width and length of your board (Most likely the same if you're using a square :) ) subtract 16 (the total size of the chess squares) from that number and divide the resulting number in half. That is your border width.
Here's an example.
My board is approx. 19 1/2" wide and tall (not exact and it varies. All you need to know is that apparently I'm very bad at routing wood. Oh well, it's still cute!)
19.75-16=3.75
3.75/2=1.875
Haha, so I decided that meant I had a border just a little over 1 3/4" wide :)

So, choose 1 corner, this is your starting point. Measure in according to your measurement from the above formula. For me that's the very scientific number of a little over 1 3/4" Make a hash mark, now measure from the other side of the corner and make another hash mark.
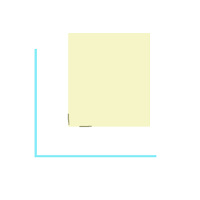
Now using a large square quilting ruler, line it up in the corner using the hash marks and draw a 16" square in the center of your board. Depending on how exact your measurements are, it should be pretty well centered.
 Now using thin layers of mod podge start applying your fabric squares alternately along the bottom edge of your drawn square. Don't worry about glue showing it's all going to be covered in the end.
Continue apply fabric chess board style until the 16" square is filled and all your fabric is on the board.
Now for the border.

Take your last fat quarter and fold the corner over diagonally to find the square and press in place.

Then pull the top point down diagonally to match it's opposite corner and press in place. You'll have a triangle with a wide strip across the base.

Rotary cut and trim the wide strip and just the very edge of the base of the triangle.
You are not cutting any folded edges! Only trimming the already cut edges to make a nice clean square!
Then cut a 1 1/4" strip from the base of your trimmed triangle.
Yay! This is your non-pieced, non-mitered border! Beautiful!
You are not cutting any folded edges! Only trimming the already cut edges to make a nice clean square!
Then cut a 1 1/4" strip from the base of your trimmed triangle.
Yay! This is your non-pieced, non-mitered border! Beautiful!

Ok, here's the best part about this project. Check out the awesome fabrics I got to use!
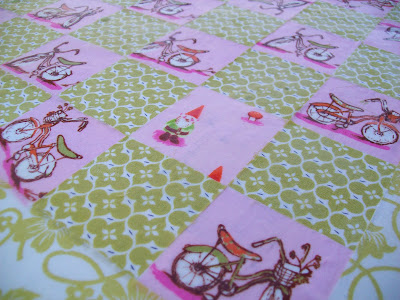
I even snuck a little gnomie in there with my bikes! I love these fabrics and now I get to play with them all the time! What a great way to highlight such special fabrics!
Hope you enjoyed this little tutorial!
Now go play a game!
Now go play a game!
p.s. Just a side note I'm considering doing something so I can cover the top with resin and make it all glassy and shiny. Wouldn't that be awesome!



very cool...too fun!! id like to play on this board
ReplyDeleteSuper cute! Wanted to say that you are one of my favorites too! I have always loved your comments!
ReplyDeleteThat is just too cute! Who wouldn't want to play chess with gnomes?
ReplyDeleteSo awesome!! I love chess and just about any board game. Thanks for the idea and the tutorial!
ReplyDeleteJennifer :)